"Rivets? Like as in Rosie the Riveter? Why would I need to know that?" You may be asking yourself. Holy crap! Rivets are my new favorite thing people!
A couple months ago I was walking through the aisles of my favorite store (AKA Harbor Freight). I was looking for extra long screwdriver bits when I bumped into a large German man. We somehow ended up in a conversation and he asked if I ever used "these", pointing to the pop rivet guns. I had actually been thinking about trying a rivet gun for months, but hadn't tried yet. I left the store that day educated about European socialized medicine and with a new rivet gun.
I recently used it to build my Wood and Leather Sling Chair.

A "pop rivet" or "blind rivet" gun, as it is called, can be used for countless applications. Here are some examples I could think of. A couple of them I didn't originally use rivets, but if I did it now, I totally would! Just giving you ideas

This is my rivet gun. Rivet guns are cheap.

Rivets are even cheaper. I picked up this box of 500 aluminum rivets for something like $10 FYI: they are available in brass and copper too!
too!

Let's take a look at a pop rivet gun. Most of the time, this is what they will look like. There is a tip attached to a nozzle looking part, and a few other tips screwed into the body.

The different tips are for different size rivets. I found out the hard way, you want to use the smallest tip possible with your rivet. Trust me.

To change the tip, use the little wrench provided and loosen the threads. You then can unscrew the old tip and screw in a different one. Remember to use the tool to tighten the new tip down.

Now you are ready to rivet! I'll show you how to use pop rivets on wood and leather. Since they are softer materials than metal (which is what pop rivets are traditionally used on) the process is slightly different.
Start by drilling a hole the same diameter as your rivet. It will say on the box what the diameter is.

Then, line up the second piece of leather or wood and drill all the way through.

Insert a rivet into the gun with the fat end sticking out, like this. The thin end goes in the gun and the fat end goes through your material.

Now, for wood or leather, you need to make sure to use rivet washers. Once again, trust me. Without the washers, the rivet will rip right through the material and cause a big problem.
Rivet washers are cheap and are usually sold right next to rivets.


Now it is time to compress the rivet. I like to place a finger on the backside, making sure the rivet is pushed all the way through before I start to compress. One negative I have discovered about my gun is that it seems to e designed for someone with hands the size of Wreck it Ralph's. It would be nice to have a third hand, but two work fine.
Make sure rivet is pushed all the way through, and that your washer hasn't fallen off, then start to squeeze the handles together. Depending on how thick your material is, you may have to squeeze anywhere from 1-4 times. Once it's done, you will hear/feel a loud "pop" (hence the name "pop rivet").

At that point, your rivet should be attached to the material, and the post off of the rivet should fall out of your gun. Easy, right?
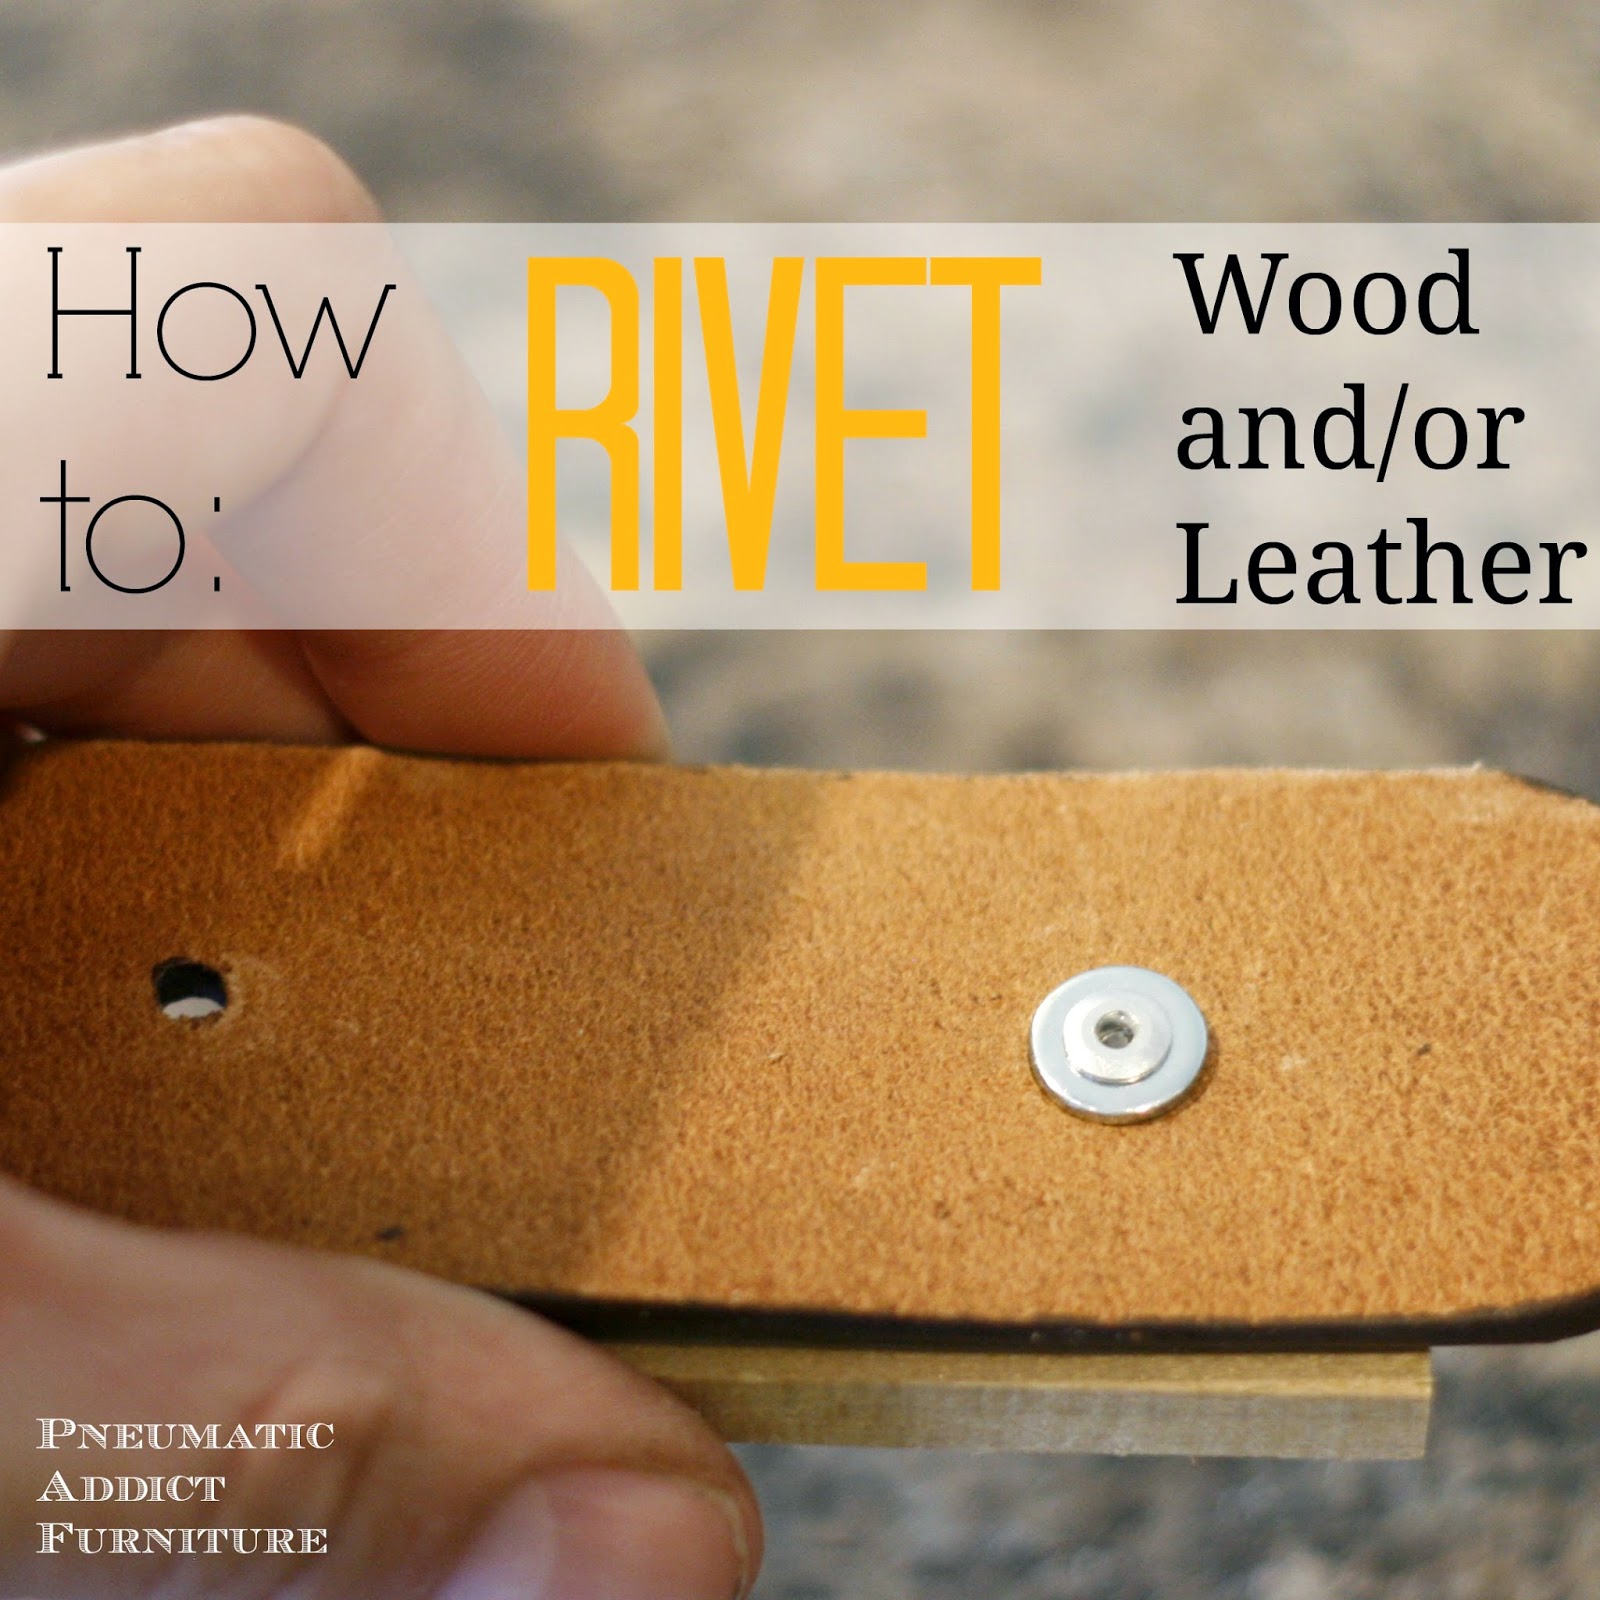
Here's what a finished rivet looks like.

The backside isn't as pretty. On a forum I was reading, someone called the backside of a pop rivet "ugly as someone else's baby".
 |
| You can see on the right side where I forgot to use a washer. The rivet almost pulled straight through the wood. |
No, go out and start riveting! The gun, rivets, and washers are all really inexpensive. Plus, it's kinda addictive.

Are you going to try it?! What project do you have that needs rivets?
Let's be friends! Follow along, so you never miss a post


*This post contains affiliate links
If you dig the Mid-Century/Industrial look, check out my:
+ Mid-Century Industrial Storage
+ World Market "Aiden" Coffee Table knock off
+ Zinc Top Coffee Table
Linking at:
Remodelaholic
www.savvysouthernstyle.net


A new tool I should get - awesome! Great tutorial. P.S. I'm glad you don't have hands the size of Wreck It Ralph's. :)
ReplyDeleteLike I need another excuse to got to Harbor Freight! You had me at pop rivet, and a tutorial to boot. You are a legend Elisha. Thanks.
ReplyDeleteLa Verne@hope&salvage
How fun! I wish you lived closer to me :)
ReplyDeleteHarbor Freight is my very favorite store too! I love getting the ad in the mail every week!
ReplyDeleteI have got to try this! I love that you just randomly met a guy in the store and came out with a rivet gun...awesome! Pinned!
ReplyDeleteThat is such a cute chair, it's very creative.
ReplyDeleteIf you were doing a bunch (like on the leather and wood chair), you could take a piece of scrap wood, drill a hole larger than the rivet and smaller than the washer and use that to hold everything in place while you squeeze the giant handle of the rivet gun (I'm a grown man and have trouble with those). Great Blog!
ReplyDeleteI've been experimenting with rivets too...I have a love/hate relationship with Harbor Freight...I bought their 3/16 Pneumatic Riveter and the handle broke halfway thru my project. To be fair I must tell you my project has about 500 rivets...it's a wood/metal project and I've found for my decorative purposes, if you don't see the back of your project, the strength of the rivet does not seem to diminish when NOT using a washer. Have fun!!
ReplyDeleteThank you so much
ReplyDeleteThanks
ReplyDeleteFantastic! Thank you so much for the tutorial, and especially for the pictures. I find it a lot easier to learn something if I can see examples. I'm planning on using rivets to build a travel case for my telescope. And if you're interested, I found a very, very good, detailed article on building 'Flight cases' at fuzzcraft dot com, flight case diy. If you travel with delicate electronics, or a rock band, and want to look professional, that's the kind of case you want. Thanks again! Bruce Albright
ReplyDeleteDrill a hole on the other side so that the washer is under the wood surface, not sticking out. It can be hidden with wooden plug and glued and sanded, although this here is pretty thin wood for that operation (to plug it also), one must say.
ReplyDeleteIn that way you get a seamless surface which is much better to sit on, than your clothes catching on rivet heads.
Thanks for the info i am going to put hinges on the hatches of my boat they are plywood so the rivet w washer idea is genius
ReplyDeleteI've used rivets with leather quite a bit and have found them to be very useful. I'm glad you brought up using a washer on BOTH sides. I've only used them on the 'back' side and haven't been thrilled with the result. Information!
ReplyDeletehi there, would you mind to share where did you purchase the rivet? The rivet i am using always end with terrible appearance and it will inster into wood even i put washer
ReplyDelete