
As promised, I finally got the Faux Tarnished Brass tutorial together.
Its a great way to take shiny, new brass and make it look old and weathered.
When doing this technique, your object needs to be clean, and as close to that tacky, yellow brass from the 80's as possible. I've done this with wood before with good results. You just need to prep the piece with a glossy, bright gold paint.

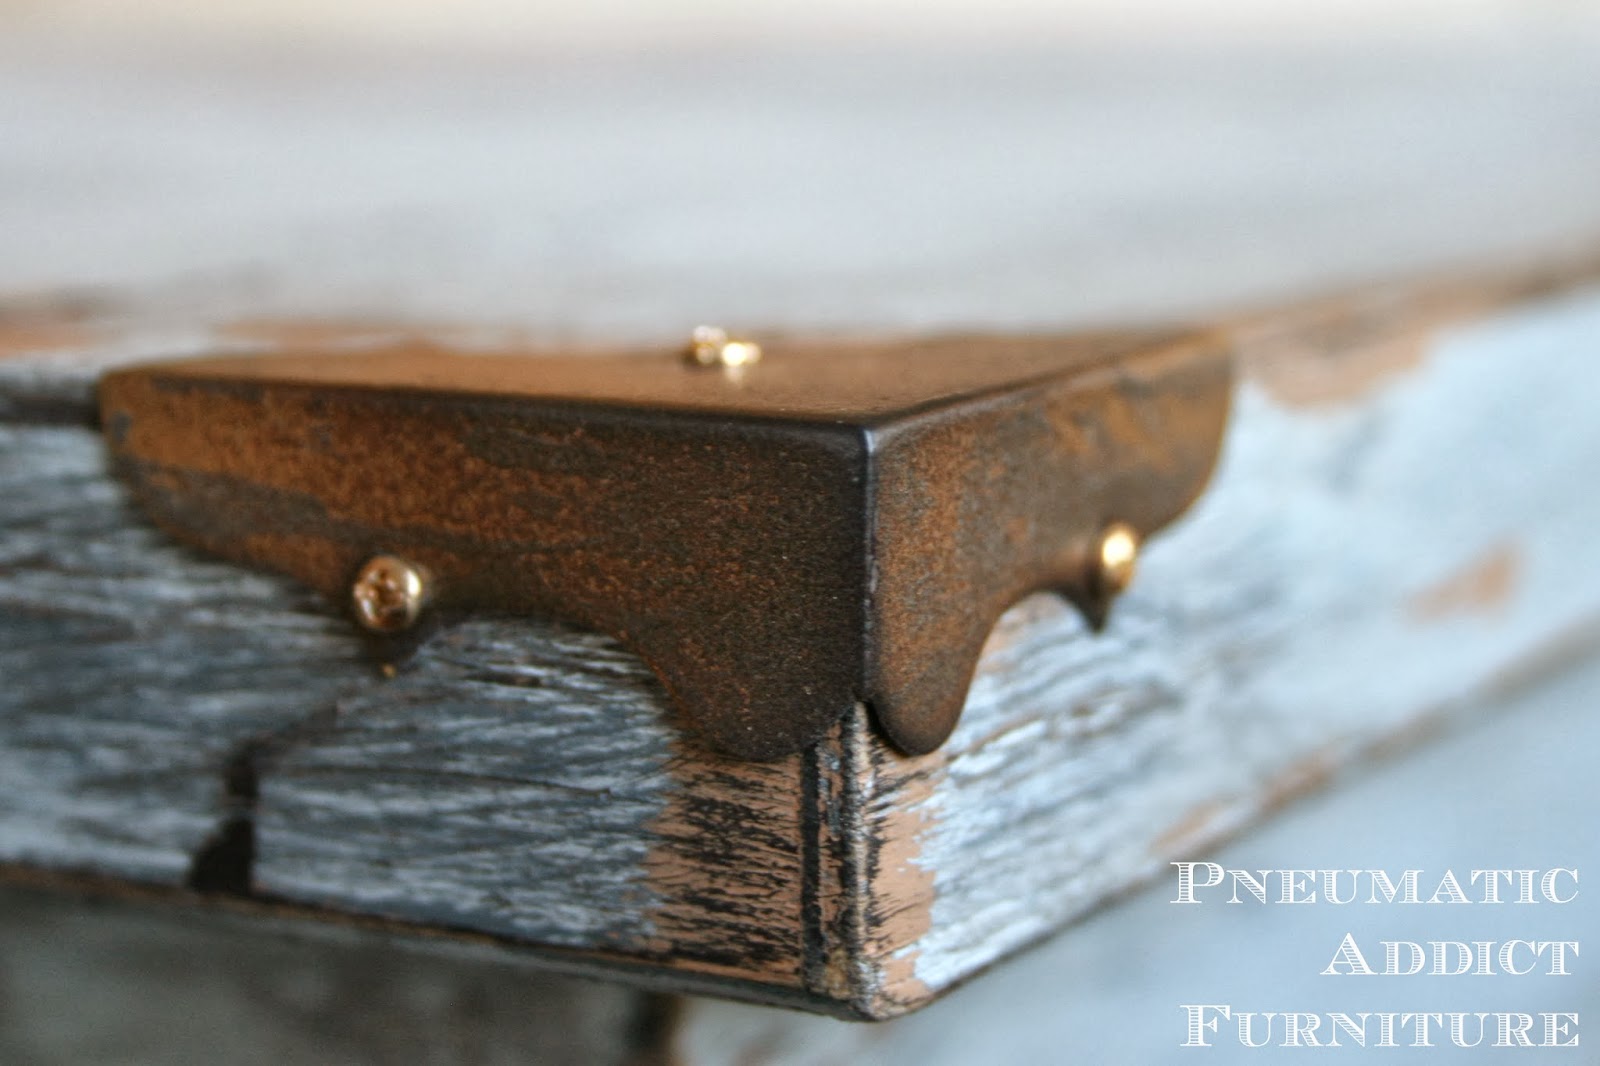
These box corners that I put on my hope chest were originally the same gold color. With these, I wanted a really grungy look. I used the same technique, but just went a little more heavy handed with the paint.
The first step is to paint the entire piece with black chalk-based paint. Does it have to be chalk-based?
Yes.

Why? A couple reasons. First, it sticks to just about anything. The polished brass is very slick. Regular, latex paint will slide right off. Also, you need to be able to wet distress it. Which is the next step.
*I've never tried homemade chalk-based paint with this technique, so I'm not sure if it would work. In my experience, the homemade stuff, while nice, just doesn't distress the same. I would recommend buying a sample pot of the store bought kind.
Once the black paint is dry, use a damp rag to rub the piece, removing a large portion of the paint. Try to keep it in the area that would normally collect junk in "real life".

After that, it's time to start layering colors. Start with the bronze/brass paint on the left, and work your way right.

DON'T WORRY! I know it's a lot of cans but its easy!
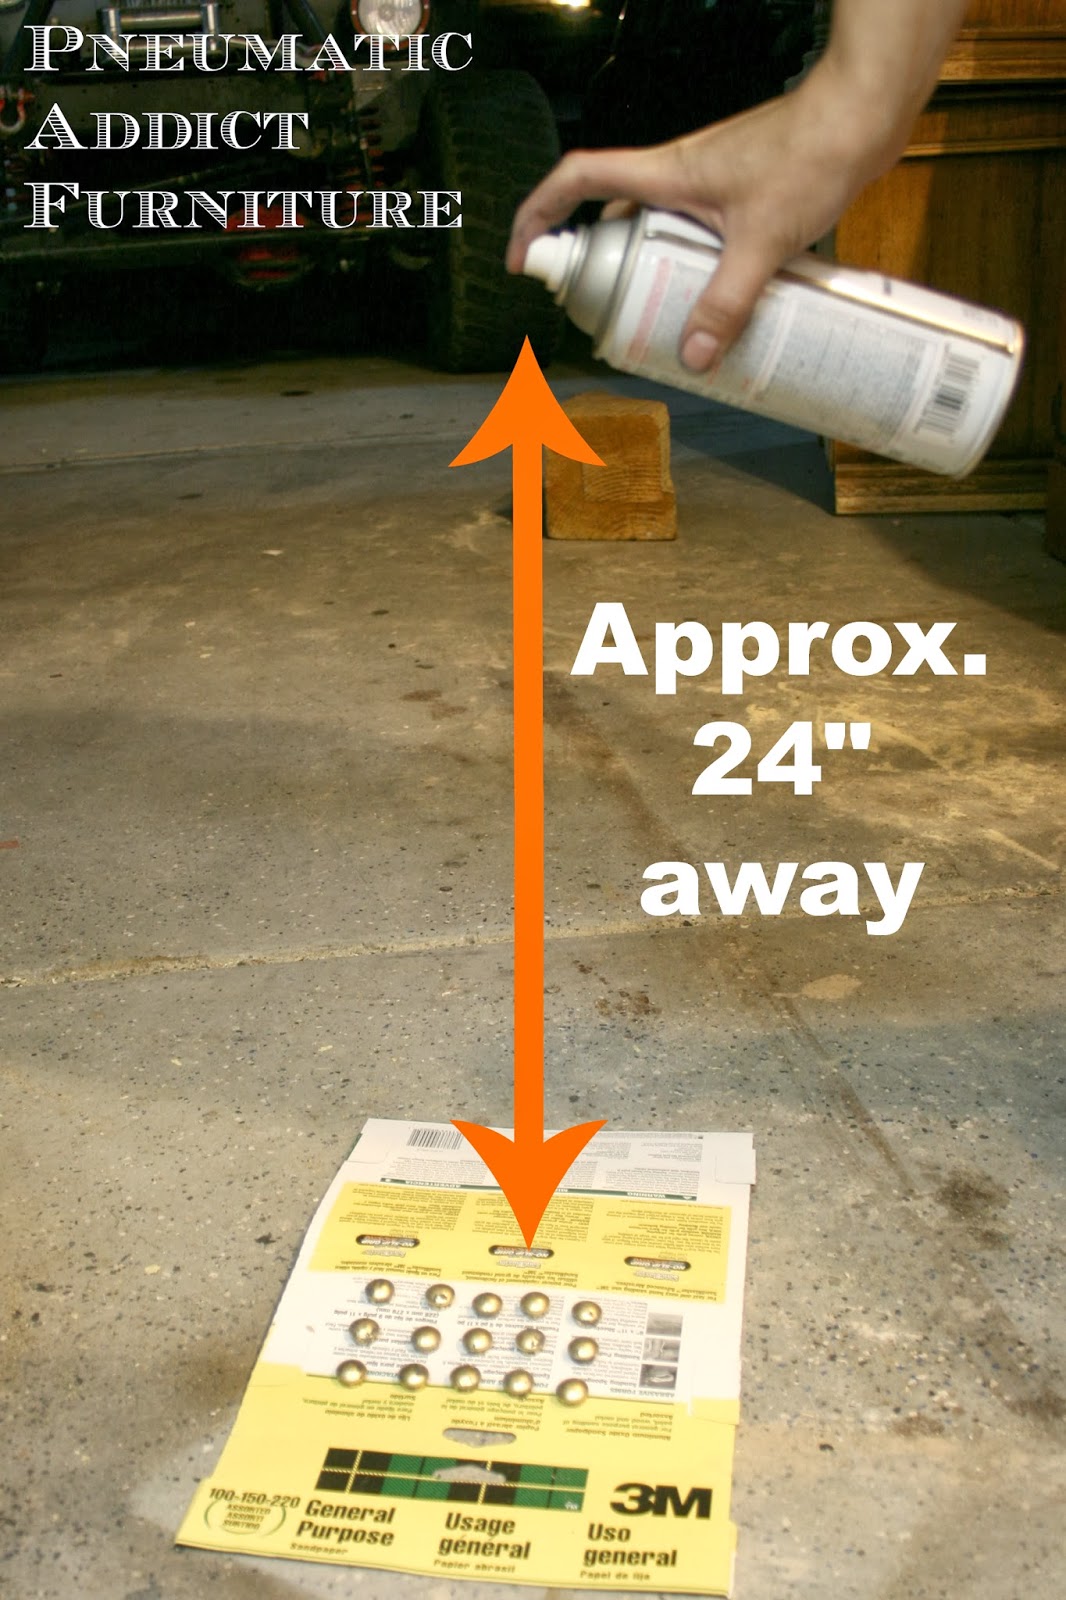
Place all your pieces close together on a piece of paper, scrap wood, etc. Hold the can approximately 24" away, and lightly start to spritz the paint. Build color slowly. The idea is to create a blended, translucent finish, not to "spray paint". When in doubt, start further away and spray very lightly.
Its actually very easy. I promise. First, spray the bronze. Let dry 30 mins. Then the flat black. Let dry 30 mins. Then the clear gloss. Let dry 30 mins. Finally, mist the flat clear over everything.
The clear gloss step is the only exception to the "spritzing" rule. Spray that stuff on fairly thick. That is what's going to protect your piece.
Once it's totally dry, you should have something that looks like this.

What do you think? Do you have something you're dying to tarnish? Please let me know if you have any questions.
Linking at:


I am amazed at how creative you are! Did you just think this up in your head? Totally impressed and I guess I need to break down and buy chalk paint because I HAVE to try this, on something! I love it and will pin right now! Thanks Elisha!!
ReplyDeleteThe look awesome...you didn't have to sand off any of the other paint? It just naturally looks like this with all the coats of paint? I love it!! Thanks for linking up and sharing this cool tip.
ReplyDeleteKarin
I love the rusty, crusty look you have achieved. Saving this for a project I have in mind! Thanks.
ReplyDeleteThe number of cans did scare me, but it DOES look easy and is totally worth the efforts. Just gorgeous. Glad I popped over from the link party at Redoux Interiors!
ReplyDelete- Tasha @ Designer Trapped in a Lawyer's Body (www.trappeddesigner.blogspot.com
Wonderful! Thanks for sharing your experiments. :-)
ReplyDeleteBlessings,
Kim @ Curtain Queen Creates
This is awesome and very timely - I started a project yesterday and wondered how I can distress the brass. I'm glad I found you over at The Pin Junkie Friday Party! Awesome tutorial that I'm definitely Pinning.
ReplyDeleteMarie@InteriorFrugalista
This is genius!!! Thank you so much for sharing. I am definitely pinning this and looking around at what needs tarnishing!
ReplyDeleteYou got an amazing effect! Love it.
ReplyDeleteWhat a beautiful transformation. Thanks so much for the tutorial on aging the metal pulls. I pinned this, and hope to find the time to try it. Now following you also!
ReplyDeleteDoreen
http://altered-artworks.blogspot.com
Thank you so much linking up! I am sharing this awesome tutorial tomorrow. Party starts at 2:00 PST :)
ReplyDeleteThis is great! I've pinned it for use sometime on one of my refabs.
ReplyDeleteThank you for sharing at the DIY Showcase this week, Alisha!
~ Megin of VMG206
This is so fabulously amazing! I love it and I'm so glad I found this post over at Karen's! I pinned it to my 'Fine Tutorials' board on Pinterest!
ReplyDeleteYou are indeed very creative
ReplyDeleteWhat kind of chalk based paint did you use?
ReplyDeleteI've purchased some license plate letters for my son't vintage car room. Do you think this process would work well on them to make them look more vintage?
ReplyDeleteI think If you masked off the center of the plate and maybe just did this treatment to the edges, it would work well. Since it is paint, if you do it to the face, you'll obscure the original image. Have fun!
Delete