*This post is sponsored by DAP products and contains affiliate links
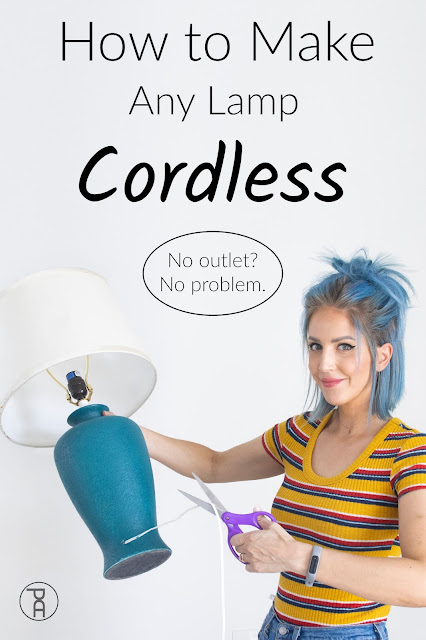
This project is something that literally has been in the works for about 5 years. Back when we were living in our previous house, I had a live edge console table behind the sofa that I used as a computer desk. The first evening I attempted to get some work done, I discovered I really needed some extra lighting. I went online to buy a cordless desk lamp and was absolutely shocked at what I found (or didn't find).
The only options that were available for purchase were small, cheap looking portable lights (not really a true table lamp) or I found one company called Modern Lantern, which makes traditional, but decent looking lamps that start at $385! Are you kidding?! There was no way on Earth I'd every spend $400-500 for a single table lamp. Additionally, I liked the idea of being able to pick the best lamp to fit the design of the space, not just the only one I could find. I began experimenting with DIY, rechargeable cordless lamp options.
Over the years, I've bought multiple battery packs and special light bulbs, trying to figure out the best option. Safety and longevity were my biggest concerns. I found multiple ways to easily provide battery power to a lamp, but some would only run a bulb for as little as half an hour. For a real solution to be an option, I wanted a lamp to be able to power a standard, E26 base light bulb, every night for at least 5 days.
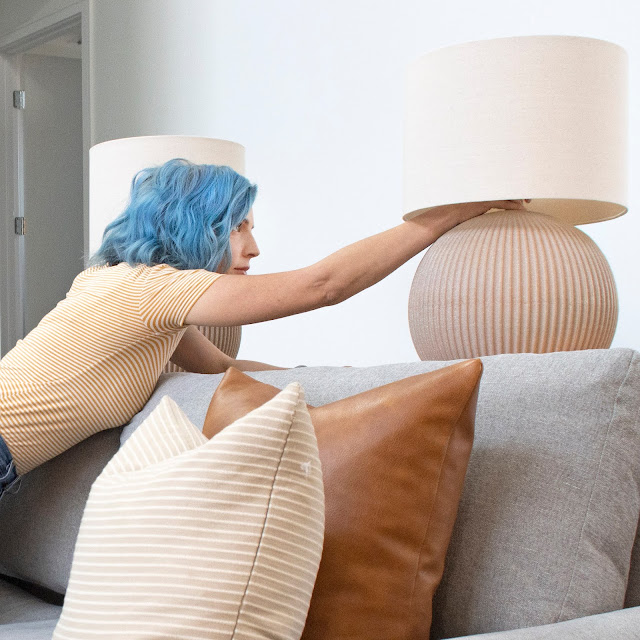
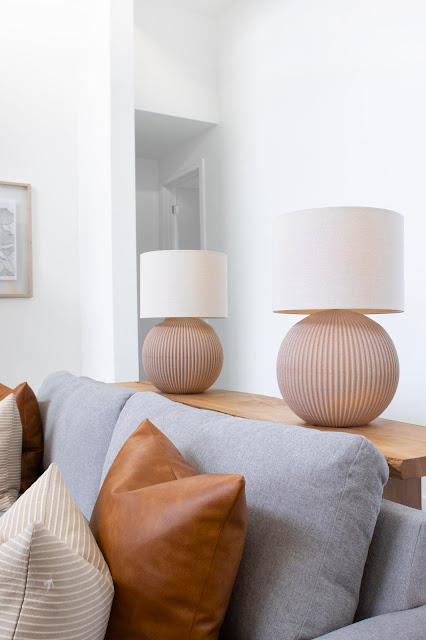
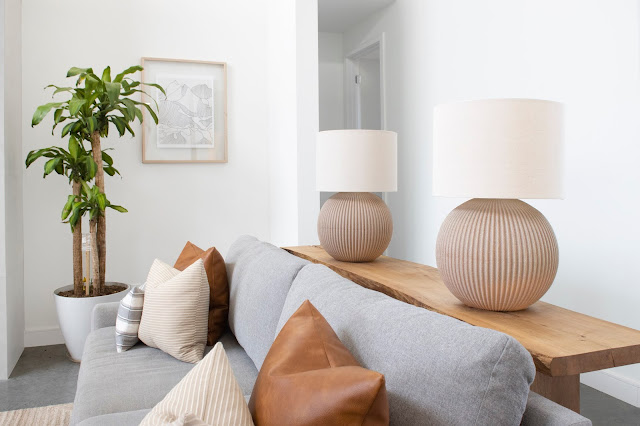
I've finally come up with 3 different options to convert a standard corded lamp into a portable, cordless lamp. Each can be installed in the lamp of your choice in less than 5 minutes. Watch the full video tutorial to see how each technique is used, or keep scrolling to see diagrams and learn more. Additionally, I built myself a pair of modern, spherical lamps from plastic lawn ornaments. Check them out below!
110V AC Power Bank with AC Inverter
The fastest way to convert a standard corded lamp is to purchase a rechargeable lithium power bank with a build in AC-DC power inverter. Here in the United States, the electricity that powers our homes is typically 110V AC, or Alternating Current. Batteries output DC, or Direct Current electricity. In order to power a standard AC appliance, like a lamp, using a battery, the electricity has to be converted from DC to AC. That's what an inverter does.
This conversion technique is by far the most simple. Just plug your existing lamp into the inverter, switch it on, and you're good to go. There are two major drawbacks. The inverter must have access to air circulation for the cooling fan to work, which is a bit noisy, and the inverter itself is a bit expensive.

Lithium USB Power Pack with 5V DC Light Bulb
The second easiest way to convert a traditional lamp into a cordless lamp is to use a rechargeable Lithium power pack with an USB outlet (the kind you would use to charge your phone) and a special, USB powered light bulb socket. Lithium power packs are cheap and available almost anywhere. The downsides of this technique are that the outlet of the original lamp has to be removed and replaced and at only 5V output, a special extra-low voltage DC light bulbs are the only ones that can be used.

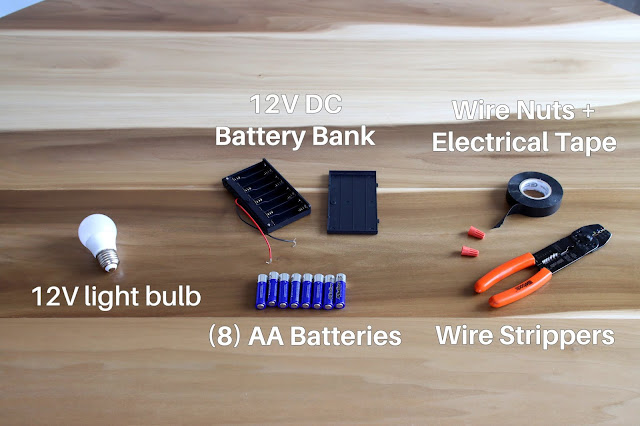
12V AA Battery Bank and 12V DC Light Bulb
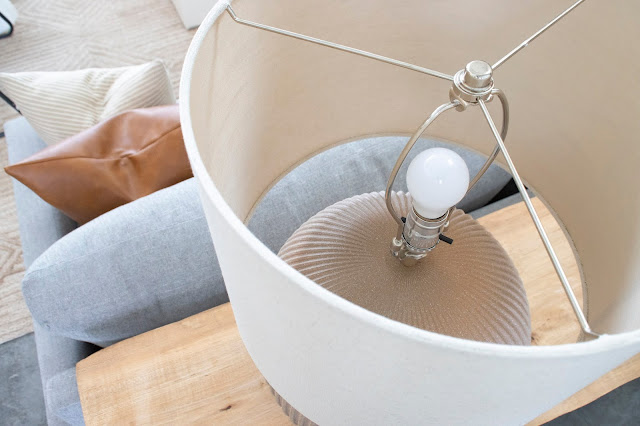
My preferred cordless lamp conversion technique used a pretty simple 12V AA Battery Bank. The battery bank is basically a plastic housing that holds 8 regular AA batteries. Since the batteries can only output DC power, a 12V DC lightbulb (typically used in RVs). The only major downside of this technique is the need to cut off the standard plug, and hardwire the battery bank in it's place. It requires some simple wiring (takes less than 5 minutes), but the straightforward result it worth it.
Making a DIY Lamp
I've made a few different lamps before. It's surprisingly easy to turn almost anything into a lamp! Here is a simple tutorial to give you an overview. I purchased a pair or large plastic orbs from At Home. They were originally intended to be turned into lawn ornaments.
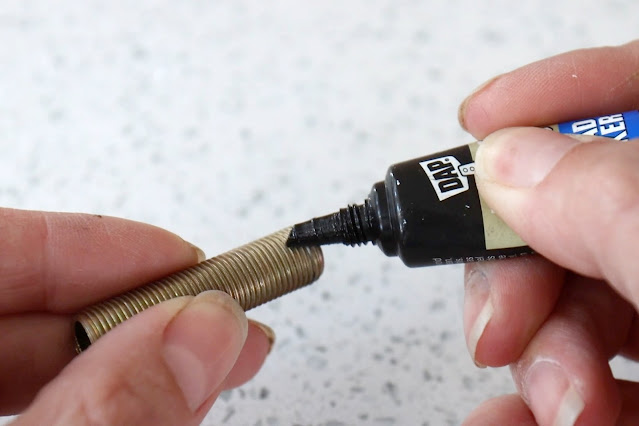
Since I had a little experience with DIY lamp making, I've noticed that not matter how hard you tighten them, some of the threaded lamp components can tend to loosen up over time. This time, I decided to use DAP Tank Bond Threadlocker to help keep everything tight.
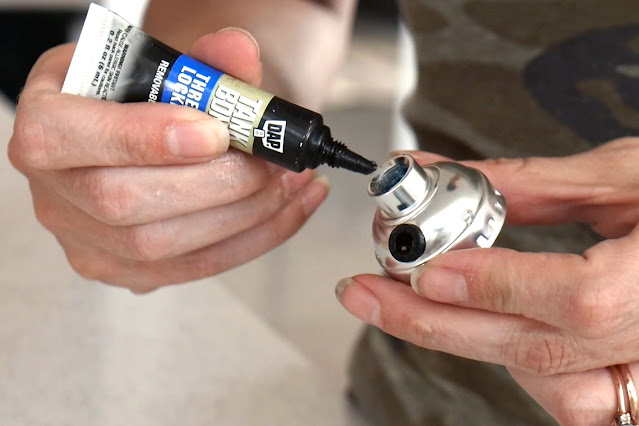
Threadlocker is special adhesive that is designed to keep metal attachments tightly together, and prevent slipping or loosening over time. DAP Tank Bond Threadlocker is especially useful because it's no-drip, gel formula lets you to place it where you need it more precisely and without making a big mess.
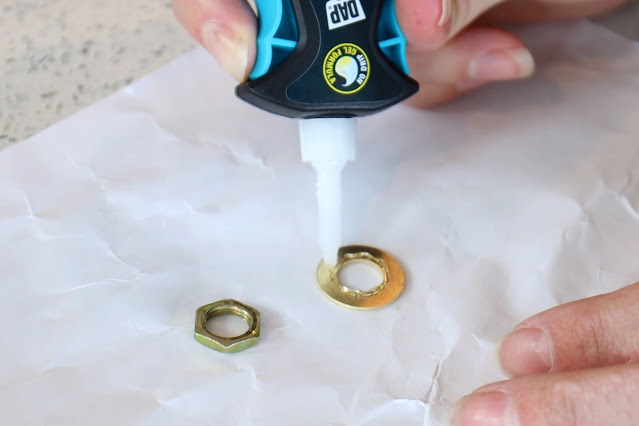
I used a couple more problems to help prevent some of the problems I've experienced making lamps in the past. For example, I used DAP RapidFuse with Gel Control Applicator to attach fiddly brass washers and nuts together.
When I began assembling my lamp parts together, I noticed a small piece of loose trim on one of the lamp shades. I recently started using DAP RapidFuse Ultra Clear and this was the perfect time to use it.
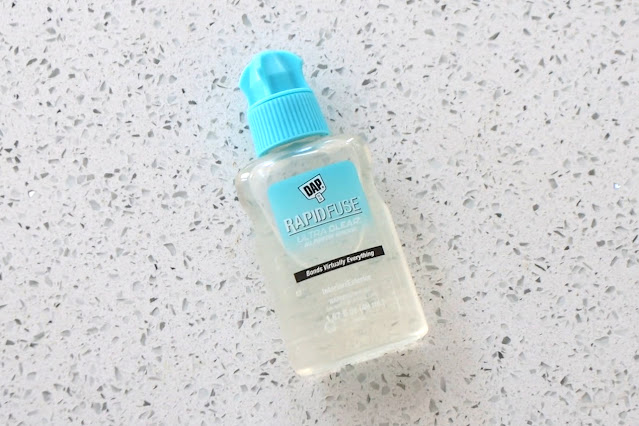
RapidFuse Ultra Clear bonds to almost anything, and unlike most quick drying glues, it stays flexible, even when fully cured, so it's great on fabrics. Also, like the name implies, it dries crystal clear making any repairs virtually impossible to detect.

Want to see the final lamps??

Remember what my two requirements were?
1. The lamps need to be able to power a standard, E26 base light bulb. - check
2. The batteries need to last at least 2-3 hours a night, for at least 5 nights. - check
As soon as the lamps were built, with fully charged battery banks, I turned the light bulbs on and let them run to test their longevity. After 32 hours the bulbs had dimmed significantly, but were still glowing. We've been using these lamps almost every night for the past couple of months and I've only charged them 3 times!
Most of all, I love that I'm not tripping over annoying electrical cords running from the sofa table to the wall.
Make sure you watch the full YouTube video above to catch all the details. If you have any questions, feel free to leave them below.
If you like that, you'll love these posts too:


Let's be friends! Follow along so you don't miss a thing!


No comments