*This video is sponsored by DAP Products and contains affiliate links.
As we approach spring, I like I imagine most of you, am turning my attention to the exterior of our property. If you want to see photos of the outside of our house and learn how we installed most of the finishes ourselves, check out this blog post and the #BuildingModernOnaBudget video series.
We've been living in the house for two years and honestly we've pretty much ignored the exterior after we shared the Reveal Video. Our house sits on a full acre of empty land. The lot had been scraped and cleared when we bought it at the end of 2019; not a single tree or bush remained. Here's a photo from before we broke ground.

The flat, barren dirt made construction a lot easier, but now that we want to fill in the space with some landscaping, it looks pretty naked. I mentioned in our initial #BuildingModernOnABudget post that the biggest motivation to build a custom house was to create a workshop space for both Bryce and myself. Bryce is a car guy and the reason why our detached shop has 16' tall walls. He's involved in amateur Driftcar Racing and is always working on either his or his friends' cars. In additional to wanting a two-post car lift, we also needed a place to store all of his car related junk. He owns a few "project" cars, as well as loads of old parts and trailers. When we purchased the 1-acre parcel, I promised him he could have the back half of the rear yard for storage, just as long as I didn't have to look at it.
During the initial construction, we had a block wall installed around the perimeter of the property. I know to those of you who don't live in the southwestern United Sates, block walls are reserved for prison yards, but with our intense climate, CMU (commonly known as cinder block) walls are the norm. The best way to designate and portion off Bryce's "junkyard" was to put up a secondary fence.

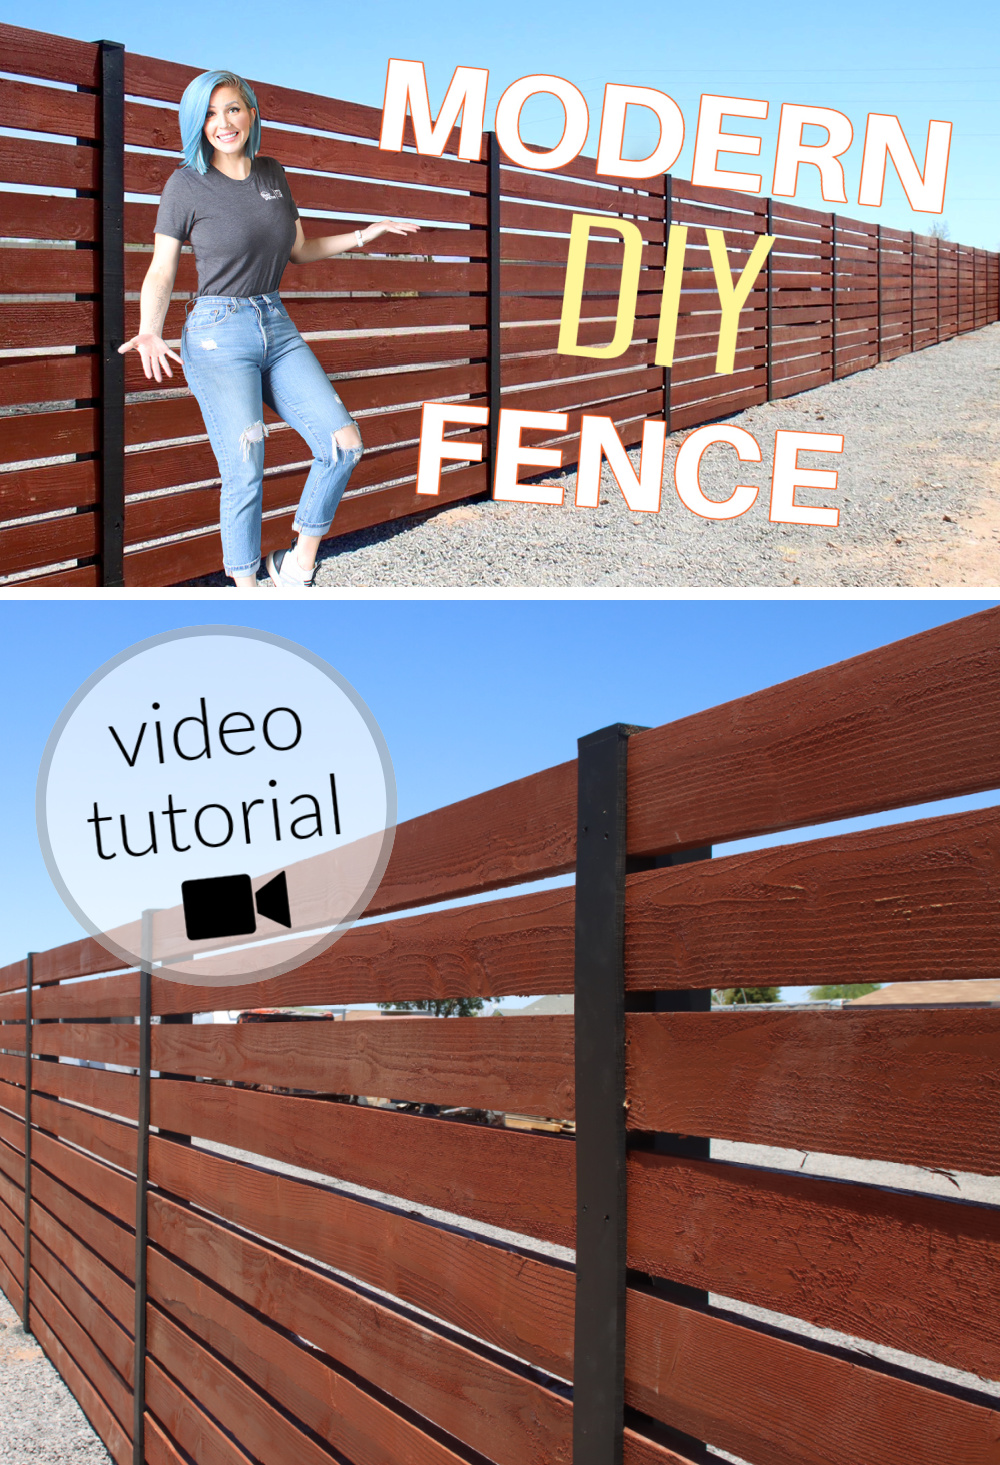
Of course it had to be pretty. To best fit our budget and skillset, we decided to use wood as our primary material. I've always liked the look of modern, horizontal slat fences and came up with a spacing design and color scheme that would help the wood tie in with the modern finishes of our house. I wanted to mimic the look of the horizontal corten steel siding that we had used.
We had a lot of fence to build! (about 120') but the two of us were able to get it installed over the course of two weekends.

Make sure you watch the full build video below to see the whole process and keep scrolling to see a few special steps we took to make sure our fence would be beautiful and functional for years to come.
Almost a year later, here are the special steps I'm glad we took while building our own DIY Modern Fence:
Using rough-sawn lumber
Rough-sawn lumber is exactly what it sounds like. They are boards that haven't been pressure treated or sanded smooth. The heavily textured surface is particularly good for exterior projects because it soaks up stains and sealants like a sponge. All those little fibers provide LOADS of surface area to grab the product, coating and protecting the wood. Film finishes (paint, poly, deck stain, etc.) tend to flake with time and UV exposure, but rarely do with rough sawn boards. The more rustic look of the rough boards works well with beefier builds like a fence as well. We used doulas fir from 84 Lumber.
Keep in mind however, since rough sawn material soaks up finishes, you'll need to purchase much more product (probably 2x as much). Also, RS boards come in actual dimensions, not nominal - meaning, a rough sawn 2 x 4 is actually 2" by 4", not 1.5" x 3.5".

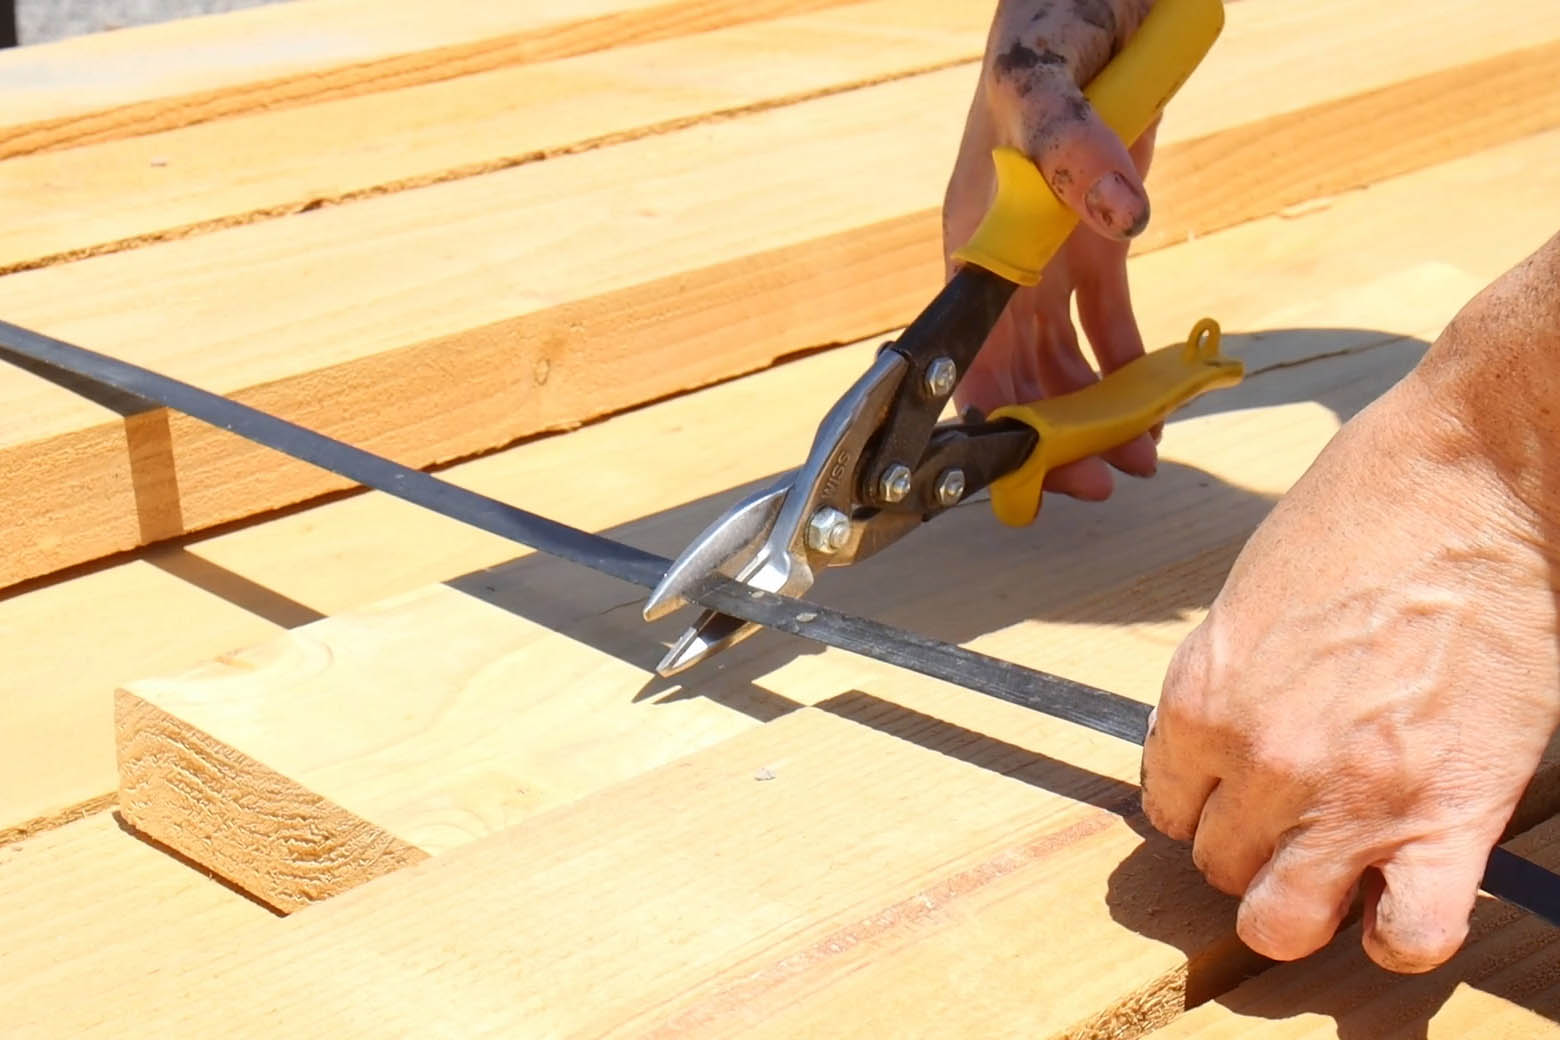
Covering exposed joints and fasteners
If you watch the build video, you'll catch the little hack I came up with to install our horizontal slats as easily as possible, but still get a sleek, modern look. The video shows it the best, but in short, we screwed the heavy 2x6 slats to one side of our posts, then covered the seams with decorative 1x4 boards, painting to match the 4x4 posts.

The boards made the fence look substantially more polished, but the perfectionist in me still wanted to address the small holes and exposed screw heads. Luckily, my current favorite wood filler, Premium Wood Filler by DAP is approved for exterior use!

Unlike most competitors, Premium Wood Filler won't shrink, crack or fall out of the hole, even after being exposed to our intense Arizona sun. I also love the fact that it can be tinted almost any color you need, using a variety of paints, dyes and stains.

Covering and sealing the end grain
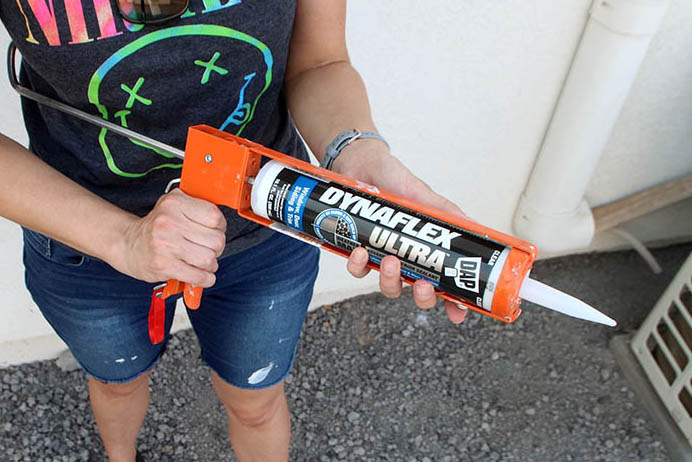
If you look at the end of a board very closely, you'll notice what's called end grain. You can think of the structure of wood like a bundle of straws. The long fibers run vertically, and when a tree is still growing, carry water from the roots up to the branches. End grain is THIRSTY! It's designed to pull liquids into the body of the wood. A typical 4x4 post is cut along the length of a tree, resulting with this porous end grain on the ends of the post. If we left the fence posts out in the rain, eventually water would be soaked up and transferred into the rest of the wood via the end grain. It's important to cover and seal end grain whenever possible, especially when building outdoor structures.

We used DynaFlex Ultra in tons of applications when we were building the house. It's extremely flexible, creating a water-tight seal that provides lifetime resistance against mold and mildew. It comes in a range of colors and I especially like the fact that it cleans up with soap and water.

Adding inexpensive solar lights
We live in a fairly rural area. It gets pretty dark at night out here. Since Bryce will occasionally be moving cars and equipment around in the junkyard after dark, I thought adding a few lights to the top of the fence would be a good idea. I found these low-profile solar lights on Amazon for less than $5 each. They don't cast a massive amount of light- just enough to mark a pleasant walking path, and don't require running electrical to the fence.
When it came time to attach the aluminum lights to the wood fence, I reached for more Dap DynaFlex Ultra.
I was worried that rainwater might get trapped behind the lights, causing the wood to rot overtime. I applied a bead of DynaFlex Ultra to the back of the lights before screwing them in place, and now I don't have to worry about water seeping in through the seams.

Want to see the final look!?


You might be wondering why we gapped the horizontal slats if the goal of the fence was security. Two reasons:
1. We live in a SUPER windy area. Last year, we saw gusts up to 90 mph! One storm was strong enough to cause our 16' garage door to buckle. A solid privacy fence would catch wind like a kite. The space between the slats will dramatically reduce the wind load force on the fence, so we can hopefully avoid it blowing down in a future storm.
2. The one rule any experienced carpenter will tell you is, wood moves. I've seen multiple wood walls develop uneven and unsightly gaps between once tight boards once expansion and contraction enter the mix. Having intentional spaces between the horizontal slats makes wood movement less intentional. If a board shrinks or bows by 1/4", it will be a lot less noticeable on our fence than a fence without gaps.
3. Yes, the idea of a fence is to create privacy, but we still want to know what's going on back there. We live on a somewhat busy road and as I mentioned before, Bryce almost always has vehicles stored in the junkyard. The slats hide the vast majority of the ugliness from view, but still provide enough visibility so we can know if we had an unwelcomed "visitor" plundering around back there. Once the landscaping is fully installed and plants have grown in, the spaces between the boards won't be noticeable, unless you're looking for them.

Now I need your help! We need to get some vegetation planted ASAP. I'm feeling totally overwhelmed by the scope and costs of irrigation/landscaping and need your advice. Where should we start??
If you like that, you'll love these ideas:


No comments