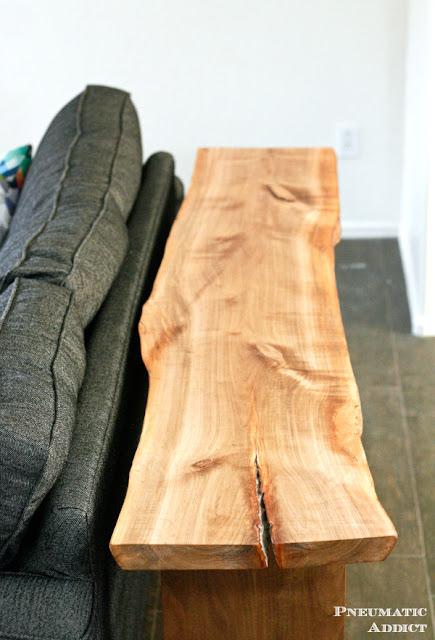
Have you noticed the live edge slab trend that's going on? A live edge slab is a board of wood that has only been milled on two sides, leaving the the natural curves and imperfections from the outside of the tree. I freaking love them!
I've been looking for an opportunity to work with a slab. Luckily, my friend Matt Cremona is a talented sawyer and woodworker and was able to hook me up with a gorgeous piece of maple.
I built my floating top console table from solid maple boards and that beautiful slab, but you can get a similar look using off-the-shelf 2 x 12's from any Home Depot or Lowes.
Materials List:
- (1) 1-1/2" x 14" x 72"- Live edge slab or other material
- (2) 2 x 12 x 96"- Boards
- (1) 1-3/8"- 12"- Hardwood dowel
- (8)4" wood screws
- (8)Hardwood hole plugs
- (4)1/4" washers
- (4)4-1/2"- 1/4" lag screws
Cut List:
- (1) Floating top, 1-1/2" x 14" x 72"
- (1) Console top, 1-1/2" x 11-1/4" x 50"
- (2) Side panels, 1-1/2" x 11-1/4" x 27-1/2"
- (4) Wood dowel risers, 2"
1. Join boards to create 11-1/4" wide panels, or use off-the-shelf 2 x 12 boards. Cut one panel 50" in length and two 27-1/2" in length.
2. Align the top of the longer panel with one edge of each shorter panel. Measure 3/4" from edge, pre-drill and countersink four holes. Add glue to connecting faces and drive 4" wood screws. Cover holes with plugs and cut flush.
3. Cut four- 2" long, pieces of 1-3/8" wood dowel. Mark the center and drill a hole through each dowel piece using a 1/4" drill bit. Paint or stain the risers and allow them to dry fully.
4. On the top of the console base, measure 4" from the end and 2" from each long side and make a mark. Using a 1/4" drill bit, drill a hole through each mark. On the underside, countersink each hole 3/8" deep with a 3/4" forstner bit. Insert 4"- 1/4" lag screw with washer through each hole on underside of console and through a wood dowel riser.
5. Cut a 1-1/2" x 14" x 72" floating top from desired material. Center the floating top on risers. With an extra long, 3/16" drill bit, reach through the bottom of the base, through the risers, and pre-drill into the bottom of the table top. Drive 1/4" x 4-1/2" lag screws, securing the top to the base. .
I'm digging the little boost of nature this simple table brings into my design.
Feeling inspired? Pin the image below and feel free to ask me any questions you may have!
* Building plans are original creations by Pneumatic Addict, but originally appeared on BuildSomething.com
Let's be friends! Follow along, so you never miss a post


Love this. Well done as always and I love the floating idea. So cool!
ReplyDeleteKim@reposhture
This is AMAZING!!! There really is just NO end to your creativity, is there?!?! I also remember Kristin from Hunted Interior creating a live edge 'look' from regular stock lumber, for those of us who can't get our hands on some of this beautiful wood...just a thought. This turned out really really gorgeous!!! great project...thanks for sharing!
ReplyDeleteVery cool! I have a question: The 2" dowel supports for the top appear to be metal/silver - Did you use something other than wood? If not, how did you get them to look chrome/silver?
ReplyDeleteThis comment has been removed by a blog administrator.
ReplyDeleteThis is real art that you have shared through this post. I was to wondering for a table. The idea of dimension that you have shared through the post is very good. Surely I am going to use these dimensions.
ReplyDeleteLooks great !!!
ReplyDeleteThank you.
I love this! I've been looking for plans similar to the Sierra Matthes Console table. This looks like a similar idea, though still quite different. Can you say how much a project like this would cost someone?
ReplyDeleteThank you! It depends on the type of wood you use. Live edge slabs can be quite expensive, but if you used 2 x 12 boards only, the whole table would only cost you around $50-60.
DeleteLove this! What did you use material wise for the risers?
ReplyDeleteFound and amazing raw piece that will create 2 smaller tables to fit our space. Love the clean look
ReplyDeleteThis DIY tutorial is great! I love your style. Keep up the good work.
ReplyDelete